Roofing emergencies rarely come with a warning. A sudden storm, fallen tree, heavy wind, or hidden structural issue can turn a stable roof into an urgent problem within minutes. When that happens, panic and poor decisions often lead to higher repair costs, interior damage, and unnecessary stress. The difference between a manageable roofing emergency and a costly disaster often comes down to preparation.
This step-by-step guide explains how homeowners can prepare for emergency roof repairs before a crisis happens. From understanding what qualifies as a roofing emergency to creating an action plan, protecting your home, and working with the right professionals, this guide will help you stay in control when it matters most.
Why Preparing for Emergency Roof Repairs Is Essential
A roof is your home’s primary defense against weather and environmental damage. When that defense is compromised, the consequences can escalate quickly.
Emergency roof damage can lead to:
Rapid water intrusion
Damage to insulation, ceilings, and walls
Mold growth within 24 to 48 hours
Electrical hazards
Structural weakening
Preparation allows you to respond calmly and efficiently, minimizing damage and restoring safety faster.
Step 1: Understand What Qualifies as a Roofing Emergency
Not every roofing issue is an emergency, but certain situations require immediate attention.
Common Roofing Emergencies
Active water leaks during rain
Missing or torn shingles exposing roof decking
Storm or wind damage
Tree or debris impact
Structural sagging or partial collapse
Ice dams causing water backup
Fire or impact damage
If the issue threatens the structure of your home or allows water inside, it should be treated as an emergency.
Step 2: Know the Weak Points of Your Roof
Preparation begins with understanding where roofs commonly fail.
High-Risk Roof Areas
Valleys where roof slopes meet
Flashing around chimneys, vents, and skylights
Roof edges and eaves
Aging shingles or membranes
Flat or low-slope sections with poor drainage
Knowing these vulnerable areas helps you monitor them before an emergency occurs.
Step 3: Schedule Routine Roof Inspections
The best emergency preparation is prevention. Regular inspections help identify small issues before they turn into urgent problems.
Recommended Inspection Schedule
Once per year
After major storms
Before winter or rainy seasons
Inspections should check:
Shingle or membrane condition
Flashing integrity
Drainage and gutters
Signs of moisture or sagging
Documenting inspection results creates a reference point if emergency repairs are needed later.
Step 4: Create an Emergency Roof Repair Plan
When emergencies happen, having a plan prevents confusion and delay.
Your Plan Should Include
Contact information for a trusted roofing contractor
Knowledge of your roofing system type
Location of attic access and electrical shutoffs
A checklist of immediate actions
Homeowners who plan ahead respond faster and reduce secondary damage.
Step 5: Identify a Reliable Roofing Professional in Advance
One of the biggest mistakes homeowners make is searching for a roofer during an emergency. This often leads to rushed decisions and unreliable service.
Instead, identify a reputable professional beforehand. Look for:
Proven experience with emergency repairs
Clear safety procedures
Proper licensing and insurance
Strong workmanship standards
A commitment to quality and professionalism is essential during high-pressure situations. This approach is reflected in Award-Winning Roofing Service Excellence, where emergency response, technical precision, and long-term performance are treated as core priorities rather than afterthoughts.
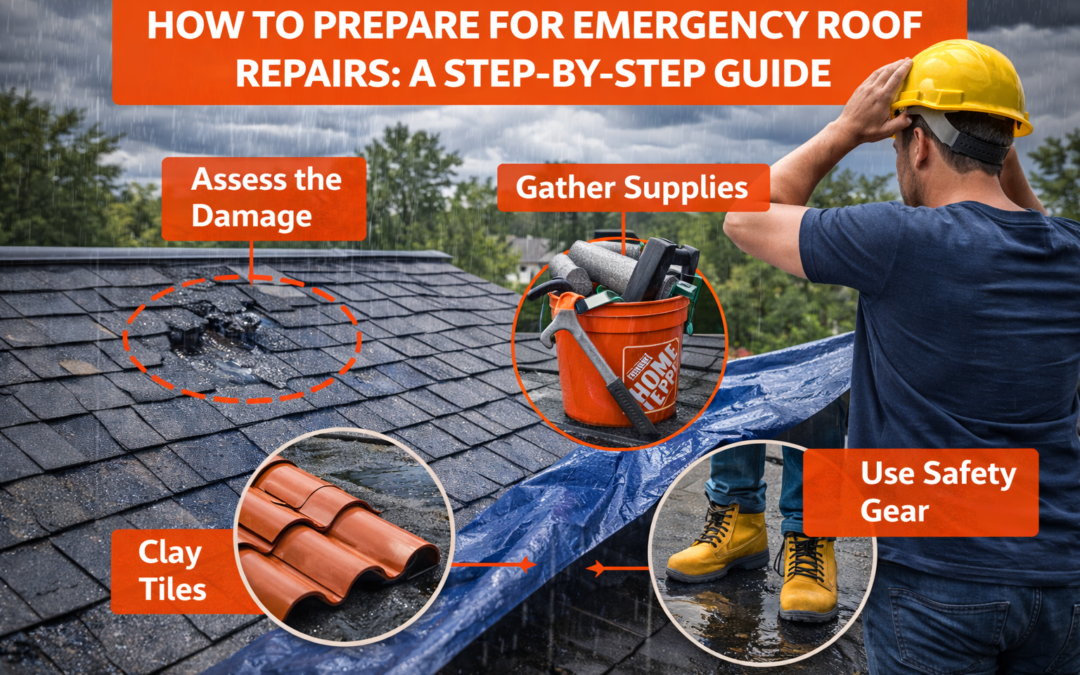
Step 6: Keep Emergency Supplies on Hand
While professional repair is always required, temporary interior protection can limit damage.
Helpful Emergency Supplies
Plastic sheeting or tarps
Buckets or containers for leaks
Towels and absorbent materials
Flashlights and batteries
Protective gloves
These supplies help manage the situation until professionals arrive.
Step 7: Know What to Do Immediately After Roof Damage Occurs
When an emergency happens, your first actions matter.
Immediate Safety Steps
Keep people away from affected areas
Avoid standing water near electrical outlets
Do not climb onto the roof during unsafe conditions
Damage Control
Place containers under leaks
Move furniture and valuables away from water
Use plastic sheeting indoors if necessary
Avoid attempting roof repairs yourself unless conditions are safe and you are trained.
Step 8: Perform a Safe Visual Assessment
Without putting yourself at risk, gather basic information.
From the ground or inside the attic, look for:
Missing shingles or panels
Sagging roof sections
Visible punctures or debris
Water stains or dripping
This information helps roofing professionals respond effectively.
Step 9: Document the Damage
Documentation is critical for insurance and repair planning.
What to Document
Photos and videos of damage
Date and time of the incident
Weather conditions at the time
Interior damage caused by leaks
Do this before any temporary repairs if possible.
Step 10: Understand Temporary vs Permanent Repairs
Emergency roofing repair usually happens in stages.
Temporary Repairs
Tarping exposed areas
Securing loose materials
Preventing further water intrusion
These measures stabilize the situation but are not permanent solutions.
Permanent Repairs
Replacement of damaged roofing materials
Flashing and membrane repairs
Structural reinforcement if required
Understanding this process helps manage expectations during emergencies.
Step 11: Review Insurance Coverage Before an Emergency Happens
Knowing your insurance coverage ahead of time prevents confusion.
Key Points to Review
Coverage for storm, wind, or impact damage
Deductibles and exclusions
Documentation requirements
Keep policy details accessible so you can act quickly.
Step 12: Communicate Clearly With Your Roofing Contractor
Clear communication ensures efficient emergency repairs.
Discuss:
Extent of damage
Temporary repair options
Permanent repair timeline
Safety considerations
Warranty coverage
Ask questions and request documentation for all work performed.
Step 13: Avoid Common Emergency Roofing Mistakes
Many homeowners unintentionally make emergencies worse.
Mistakes to Avoid
Delaying professional help
Attempting unsafe DIY repairs
Ignoring small leaks
Choosing contractors based on speed alone
Failing to document damage
Avoiding these mistakes reduces long-term costs.
Step 14: Plan for Post-Emergency Follow-Up
After emergency repairs, further steps are often required.
Post-Repair Actions
Schedule a full roof inspection
Address underlying issues
Review repair warranties
Update maintenance plans
Emergency repairs should be the start of a long-term solution, not the end.
Step 15: Strengthen Your Roof Against Future Emergencies
Preparation does not stop once repairs are complete.
Preventive Measures
Upgrade aging materials
Improve drainage and ventilation
Reinforce flashing and weak points
Schedule routine maintenance
Strengthening your roof reduces the likelihood of future emergencies.
How Preparation Reduces Costs and Stress
Prepared homeowners experience:
Faster emergency response
Reduced interior damage
Lower repair costs
Less emotional stress
Better insurance outcomes
Preparation turns chaos into a controlled process.
Emergency Roof Repairs for Different Roof Types
Preparation varies by roofing system.
Shingle Roofs
Watch for missing or lifted shingles
Monitor flashing and valleys
Metal Roofs
Check fasteners and seams
Inspect for impact damage
Flat or Low-Slope Roofs
Monitor drainage
Watch for ponding water
Knowing your roof type helps you prepare more effectively.
When Emergency Repairs Signal the Need for Replacement
Sometimes emergency damage reveals deeper issues.
Signs replacement may be needed:
Repeated leaks
Widespread material failure
Structural damage
Roof nearing end of lifespan
A professional assessment helps determine the right path.
Conclusion: Preparation Is the Key to Roofing Emergency Success
Roofing emergencies are stressful, but they do not have to be overwhelming. By understanding your roof, planning ahead, identifying trusted professionals, and knowing exactly what to do when damage occurs, you can protect your home, your finances, and your peace of mind.